
 By Marcus J. Holloway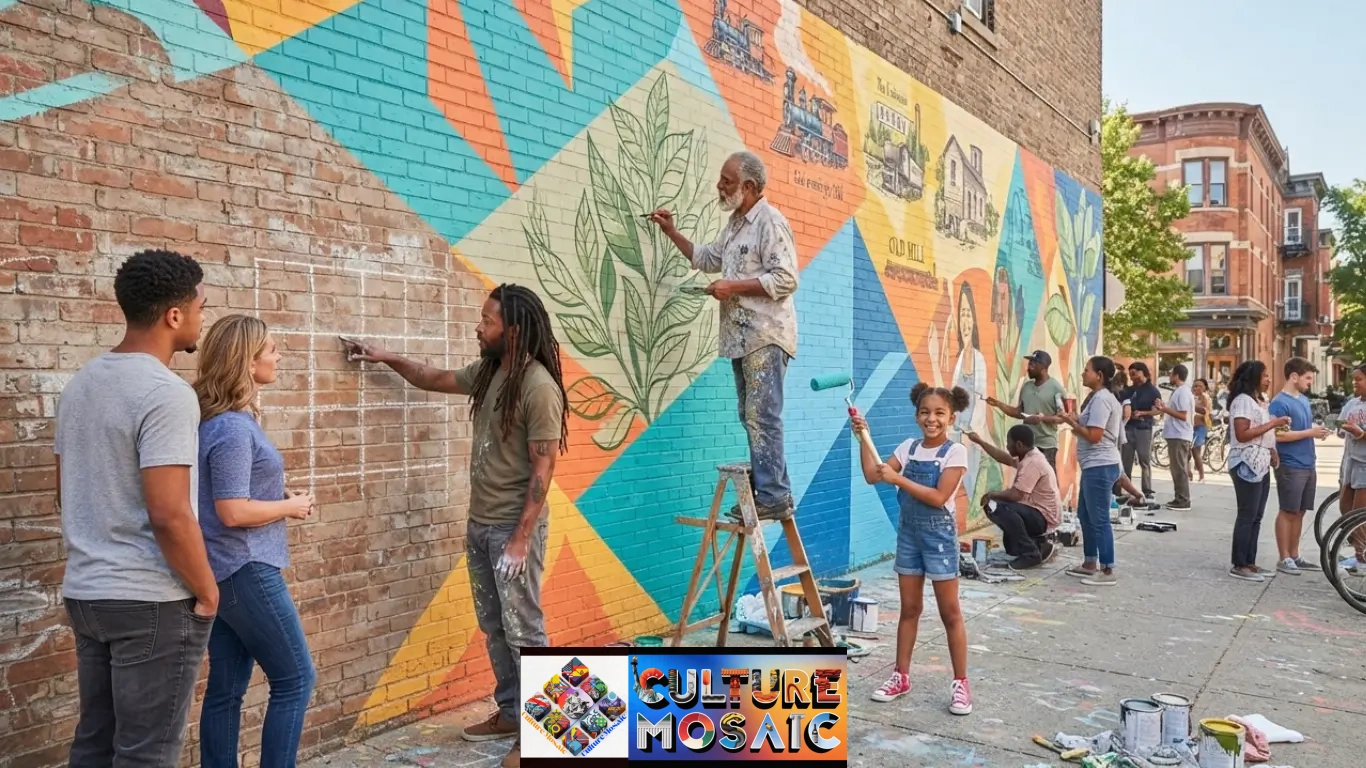
An empty, neglected wall in a neighborhood isn’t just a blank surface—it often reflects local disconnect or public oversight. Transforming that brick or concrete into a vibrant focal point through collaborative art is one of the most effective ways to rebuild civic connection.
Organising a neighbourhood mural is far less about paint and artistic skill than it is about relationships, consensus, and tactical project management. This guide breaks down how to navigate site approvals, organize community engagement, secure funding, and execute a lasting public art installation.
Quick Summary
Organising a neighbourhood mural requires a structured, multi-phase approach:
- Preparation & Approvals: Secure written property owner consent and municipal permits, and conduct wall surface assessments.
- Community Co-Design: Host inclusive design workshops to gather local input, establish shared themes, and build neighborhood consensus.
- Funding & Logistics: Secure micro-grants or local business sponsorships, procure exterior-grade masonry materials, and establish safety protocols.
- Execution & Longevity: Use accessible painting methods (such as grid or paint-by-number systems) for volunteer participation, and apply UV/anti-graffiti protective sealants for long-term preservation.
Understanding the Civic Impact: Process Over Product
When public space feels neglected, residents often feel powerless to improve their immediate surroundings. While physical issues like crumbling infrastructure require policy solutions, micro-level community challenges—such as low civic engagement, lack of neighborhood identity, and social isolation—can be addressed directly through local initiatives.
Key Insight: A public art project isn’t just decoration—it’s a high-impact method ofDIY Placemaking Community Engagement. When neighbors participate in transforming a shared wall, they move from passive observers to active stewards of their public spaces.
Phase 1: Site Selection, Permits, and Approvals
Choosing the right wall prevents legal complications and project delays.
1. Wall Assessment & Ownership Consent
Before finalizing a location, verify ownership through public land registries or local council records. You must secure a signed, written Property Owner Agreement specifying:
- Permission to prep, paint, and seal the wall.
- Duration of the mural display (typically 5 to 10 years).
- Maintenance and repainting protocols.
2. Wall Material & Preparation
A mural’s lifespan depends heavily on the underlying surface:
- Brick & Concrete: Require high-pressure washing, masonry patching, and a heavy-duty alkali-resistant exterior acrylic primer.
- Previously Painted Surfaces: Require scraping off loose paint and applying a stain-blocking primer.
- Avoid: Unsealed wood or crumbling plaster, which absorb moisture and cause premature peeling.
3. Navigating Neighborhood Mural Permits and Approvals
Contact your local municipal planning office or public arts commission. Most jurisdictions require:
- A formal public space alteration application.
- Structural safety plans (if using scaffolding or staging).
- A brief public notice period for immediate neighbors.
Phase 2: Budgeting and Sourcing Funds
Community murals vary widely in cost based on wall size, equipment needs, and artist stipends.
| Expense Category | Typical Cost Range | Key Items Included |
| Artist & Facilitator Fees | $1,500 – $5,000 | Design creation, community workshop facilitation, outline scaling. |
| Materials & Surface Prep | $500 – $1,500 | Masonry primer, exterior acrylic paint, brushes, rollers, anti-graffiti coat. |
| Equipment & Safety | $200 – $1,200 | Scaffolding rental, ladders, drop cloths, tape, PPE, safety barriers. |
| Community Logistics | $100 – $400 | Refreshments, flyers, workshop supplies, volunteer insurance. |
| Total Estimated Budget | $2,300 – $8,100 | Costs scale depending on wall surface area and professional involvement. |
Funding Strategies
- Micro-Grants: Apply for municipal arts funding or community improvement grants (such as the Love Your Block Grant 2026).
- Local Business Sponsorships: Sourcing paint donations or direct funding from neighborhood businesses in exchange for logo placement on project signage.
- Crowdfunding & Micro-Donations: Hosting community fundraisers that foster shared ownership across the neighborhood.
Phase 3: Community Co-Design and Artist Collaboration
A common pitfall in public art is imposing an outside artist’s vision without neighborhood input. Successful Tactical Urbanism in Community Civic Engagement relies on co-design.
Community Co-Design Process
How to Engage Neighbors in Public Art
- Host Feedback Sessions: Gather stories, local history, and design suggestions using open-ended surveys and vision boards.
- Translate Input Visually: The lead artist creates 2 or 3 design variations based directly on community input.
- Public Voting: Display options online or at local community centers to build consensus before painting begins.
Phase 4: Execution & Community Painting Days
Executing a mural with volunteers of varying skill levels requires structured techniques.
Scaling the Design: Grid vs. Projection Methods
- The Grid Method: Draw a proportional grid over the approved sketch and a corresponding grid on the primed wall. This allows volunteers to paint section by section accurately.
- Doodle / Pounce Grid: Cover the wall in random shapes or letters, photograph it, overlay the digital design, and trace the intersecting paths onto the wall.
How Do You Paint a Mural If You Cannot Draw?
Organizers can use a paint-by-number system. The lead artist outlines the design on the wall using paint pens and codes each section with a color key. Volunteers then fill in designated sections, while skilled artists handle detailed linework and shading afterward.
Phase 5: Materials, Safety, and Longevity
Selecting durable materials ensures the installation withstands environmental exposure and traffic.
- Best Paint for Outdoor Walls: Use 100% lightfast, exterior-grade acrylic masonry paint (such as Golden Artist Colors, Nova Color, or high-end exterior architectural acrylics).
- Protective Sealants: Apply a clear, non-yellowing acrylic topcoat with UV protection.
- Anti-Graffiti Coatings: Use a sacrificial or wax-based anti-graffiti coat over the topcoat. If vandalized, tags can be removed with a high-pressure hot water wash without damaging the paint beneath.
- Expected Lifespan: A properly primed, painted, and sealed exterior mural typically lasts 10 to 15+ years before requiring major touch-ups.
FAQs About Organising a Neighbourhood Mural
1. How long does it take to complete a community mural project?
A typical project takes 2 to 4 months from initial site selection to the final clear coat. Site approvals, community workshops, and fundraising take up about 80% of the timeline, while the actual painting phase usually takes 2 to 7 days.
2. What permits are typically required for a neighborhood mural?
Requirements vary by municipality, but most projects require written property owner consent, a municipal public art or building alteration permit, and historic district clearance if the wall is in a heritage zone. If painting requires blocking a sidewalk or street, a temporary right-of-way permit is also necessary.
3. How much does a community mural cost on average?
Small to medium community murals (approx. 100–300 sq. ft.) typically cost between $2,500 and $8,000. This covers artist stipends, surface preparation, high-grade exterior acrylic paints, safety equipment rentals, and anti-graffiti sealants.
4. How do you prevent mural vandalism and graffiti?
The most effective defense against vandalism is deep community ownership; murals created through broad local participation are rarely targeted. Technically, applying a wax-based anti-graffiti coating allows any tag to be washed off with hot water without harming the underlying paint.
5. Can non-artists and children participate in painting the mural?
Yes. Using a structured “paint-by-number” outline system allows volunteers of all ages and skill levels to paint base colors safely. The lead artist or experienced team members then complete the final outlines, details, and blending.
References & Credible Sources
- National Endowment for the Arts (NEA): Our Town Grant Program Guidelines & Creative Placemaking Resources. [Arts.gov]
- Project for Public Spaces (PPS): Placemaking and Public Art Strategies for Local Communities. [PPS.org]
- American Institute for Conservation (AIC): Best Practices for the Care and Preservation of Outdoor Murals. [CulturalHeritage.org]
 Culture Expert