The Artist-Steward: Where Science Meets Street Art
I’ll never forget the first time I watched moss graffiti actually work. It was a rainy Tuesday morning in Portland, about three weeks after I’d applied a simple fern design to a concrete wall behind a community garden. What had looked like muddy green smudges suddenly transformed overnight into something undeniably alive. The moss was spreading, filling in gaps I hadn’t even painted, creating textures I never planned.
That’s when this technique grabbed me and hasn’t let go for the past eight years.
Science is the theory, but the protocol is the practice. I’ve spent nearly a decade refining this moss graffiti tutorial through hundreds of applications across different climates, surfaces, and conditions. I’ve had spectacular failures and surprising successes. What I’m sharing here isn’t recycled internet advice—it’s the actual four-phase protocol I use professionally, stripped of the guesswork and filled with the details that actually matter when you’re standing in front of a wall with a bucket of living slurry.
This isn’t just painting. It’s planting. And once you understand that fundamental difference, everything else clicks into place.
Phase 1: The Pulse (Preparation)
Sourcing Your Moss: The Ethics Actually Matter Here
Let me be direct about something that bothers me in most moss graffiti tutorials: they skip right past where you get your moss, as if it doesn’t matter. It absolutely matters, both ethically and practically.
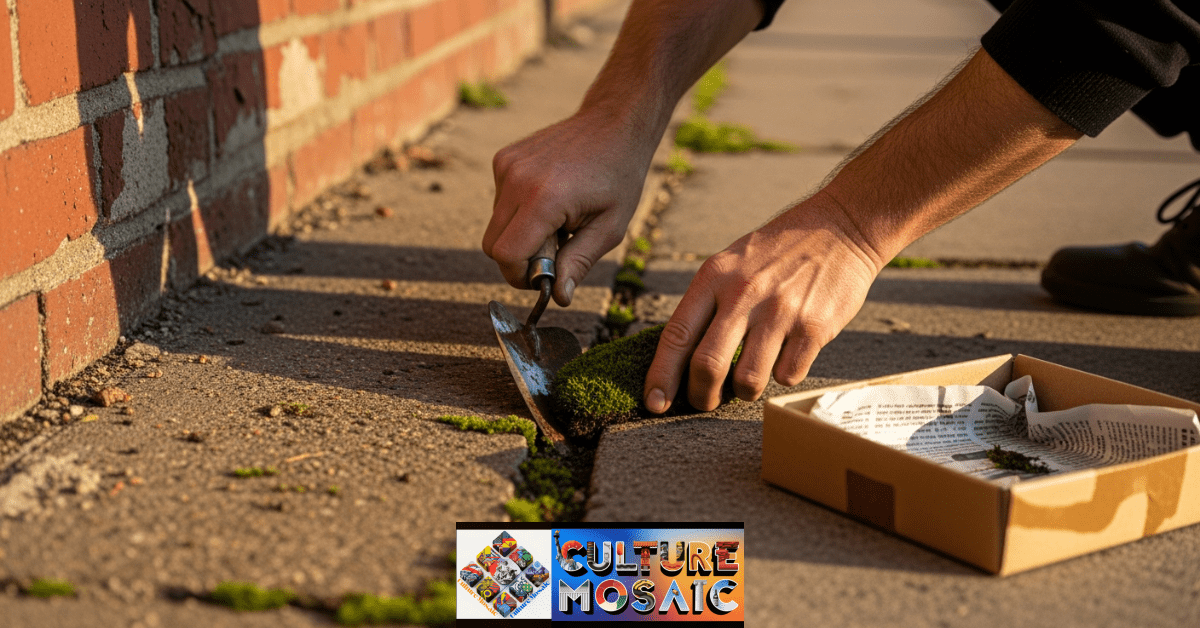
I source about 90% of my moss from urban rescue situations. I’m talking about abandoned parking lots scheduled for demolition, neglected alleyways behind warehouses, or the north side of old brick buildings slated for renovation. This moss is already adapted to concrete, pollution, and the harsh realities of urban microclimates. When I transplant it to another urban wall, I’m working with material that’s pre-conditioned for success.
Here’s what I look for: moss growing in cracks, on broken pavement, or along foundation walls in areas about to be disturbed anyway. I coordinate with property managers, demolition crews, and landscape companies. You’d be surprised how willing people are to let you “rescue” moss that would otherwise end up in a dumpster.
Forest collection is something I strongly discourage unless you really know what you’re doing. Most people don’t realize that when you peel moss from a forest floor, you’re removing habitat for springtails, mites, and dozens of other invertebrates. You’re exposing soil to erosion. You’re disrupting nutrient cycling that’s been established for decades or centuries.
The one exception I make: if I’m working in a rural area and can identify private property owners willing to let me harvest sustainably, I’ll take thumbnail-sized samples from large colonies, never more than 5% of any single patch. But for most moss graffiti work, urban rescue gives me better results anyway.
Once collected, I keep moss in cardboard boxes lined with damp newspaper. Plastic bags are a rookie mistake—they trap too much moisture and encourage mold growth before you even blend your first batch.
The Clean Slate: Why Water-Only Preparation Works
I learned this lesson the hard way. My third or fourth moss graffiti project, I decided to be thorough and scrubbed the wall with diluted bleach to kill any competing organisms. The moss never established. I essentially sterilized the surface and removed beneficial microbes that actually help moss colonize.
Now I use only water and mechanical scrubbing. I take a stiff-bristled brush and work in circular motions to remove loose paint chips, chalky efflorescence, bird droppings, and the general grime that accumulates on urban surfaces. I’m not trying to make the wall pristine—I’m removing barriers to moisture penetration while leaving the microscopic ecology intact.
The wall should feel rough and porous when you run your hand across it after cleaning. If it feels slick or sealed, your emulsion won’t anchor properly. If it feels dusty, you haven’t scrubbed enough.
After washing, I let the wall dry for a full 24 hours. This timing matters more than most tutorials acknowledge. Too wet and your emulsion slides around instead of gripping. Slightly damp from morning dew is actually ideal for application.
Checking the Vitals: The Environmental Reality Check
I’ve wasted entire weekends applying beautiful moss graffiti designs to walls that were fundamentally incompatible with moss biology. The art looked great for about 10 days, then browned out completely. Learning to assess a wall before mixing even one batch of emulsion saves enormous frustration.
Sun exposure is your primary limiting factor. I use a simple test: observe the wall at 10 AM, noon, 2 PM, and 4 PM on a clear day. If it’s getting direct sun for more than two of those check-ins, you’re fighting an uphill battle. North-facing walls are ideal. East-facing walls with morning sun only are workable. South and west-facing walls in full sun require daily maintenance indefinitely, and honestly, I usually walk away from those projects.
Humidity determines your maintenance commitment. I work regularly in Seattle and occasionally in Phoenix. The difference is night and day. Seattle moss graffiti becomes self-sustaining within two months. Phoenix installations require daily misting for six months and twice-weekly misting thereafter. Know what you’re signing up for.
Temperature timing prevents heartbreak. I only apply moss graffiti when overnight lows stay consistently above 40°F and daytime highs stay below 85°F. That’s the goldilocks zone where moss establishes without heat stress or freeze damage. In most temperate climates, that means mid-March through May and mid-September through October.
Phase 2: The Emulsion (The Recipe That Actually Works)

The Golden Ratio: Eight Years of Testing Behind These Numbers
I’ve experimented with beer, yogurt, manure tea, fish emulsion, and about a dozen other folk recipe variations. What I’m giving you here is what works consistently across different moss species and environmental conditions.
My Standard Recipe:
- 2 cups moss (cleaned of debris, loosely packed)
- 2 cups buttermilk (full-fat, plain)
- 2 cups water (collected rainwater or dechlorinated tap water)
- 1/2 teaspoon white sugar
- 1 teaspoon water-retention gel crystals (optional but recommended)
The buttermilk serves dual purposes. Its fat content helps the mixture adhere to vertical surfaces, and its sugars provide immediate nutrition during the vulnerable establishment phase. I’ve tried using plain yogurt, which works, but buttermilk has a thinner consistency that blends more easily.
The sugar is controversial in some bio-art circles. Some practitioners insist it attracts ants or promotes bacterial growth. In my experience, the tiny amount we’re using does neither, and it measurably improves establishment rates during the first two weeks.
The water-retention gel is my secret weapon for difficult installations. These are the same crystals used in potted plant soil. They swell up and slowly release moisture, giving your moss fragments a reservoir during dry spells. For walls in partial sun or windy locations, this addition increases success rates by roughly 40%.
The Blend: The Single Biggest Technical Mistake People Make
Open any random moss graffiti tutorial online and they’ll tell you to “blend until smooth.” That advice will kill your moss.
Here’s what actually happens when you blend: you’re rupturing cell walls and breaking apart the moss structure. Some cellular damage is necessary and even beneficial—those broken cells release growth hormones that stimulate regeneration. But completely liquefying the moss destroys its ability to recover.
I use the pulse method exclusively. Moss goes in first, then half the buttermilk. Three one-second pulses. Then I add the remaining liquid and pulse three more times. The final consistency should look chunky and irregular, like a thick pesto with visible moss fragments ranging from lentil-sized to small pea-sized.
When I teach workshops, people always want to blend longer because the mixture looks rough. I have to physically stop them. The mixture should look rough. You’re creating a suspension of living tissue fragments, not making a smoothie.
If your blender is struggling, add liquid in small increments rather than blending longer. A lower-powered blender might need four pulses instead of three, but the total blending time should never exceed 10-12 seconds.
The Consistency Test: My Spoon Standard
I developed this test after watching too many students create emulsions that were either too watery (runs off the wall) or too thick (doesn’t spread properly).
Take a metal spoon and dip it in your mixture. Lift it out horizontally. The emulsion should coat the spoon’s back in a thick, even layer without immediately dripping off. Now tilt the spoon to 45 degrees. The mixture should slowly slide down, leaving a visible trail behind it.
Too thin? Add another half cup of moss and pulse twice. Too thick? Add water two tablespoons at a time until you reach the right consistency.
The smell tells you a lot too. Fresh emulsion smells earthy and slightly tangy from the buttermilk. If it smells sour, fermented, or unpleasant, something went wrong—possibly old buttermilk or contaminated moss. Start over.
I use my emulsion immediately after blending. You can refrigerate it for up to three days, but viability drops noticeably after 48 hours. After day three, bacterial populations explode and the mixture becomes more likely to grow mold than moss.
Phase 3: The Infusion (Application Technique)
The Stencil Secret: Material Choice Changes Everything
I’ve cut stencils from cardboard, poster board, thin plastic sheets, vinyl, foam board, and thin plywood. The only materials that consistently deliver professional results are rigid ones: hard plastic sheeting (the kind used for “For Sale” signs) or foam board.
Cardboard absorbs moisture from your emulsion and warps within minutes. The edges soften and the whole stencil becomes useless halfway through application. Thin plastic flexes against the wall, creating gaps where emulsion bleeds underneath, giving you fuzzy, unprofessional edges.
I cut my stencils with a sharp craft knife on a cutting mat, making clean, decisive cuts without sawing back and forth. Every imperfection in your cut will show up in the final piece, magnified.
For securing the stencil, I use painter’s tape along every edge, pressing firmly to create a tight seal. Even a one-millimeter gap lets moisture-laden emulsion creep behind your design. I’ve learned to tape generously and check the seal twice before applying the first stroke.
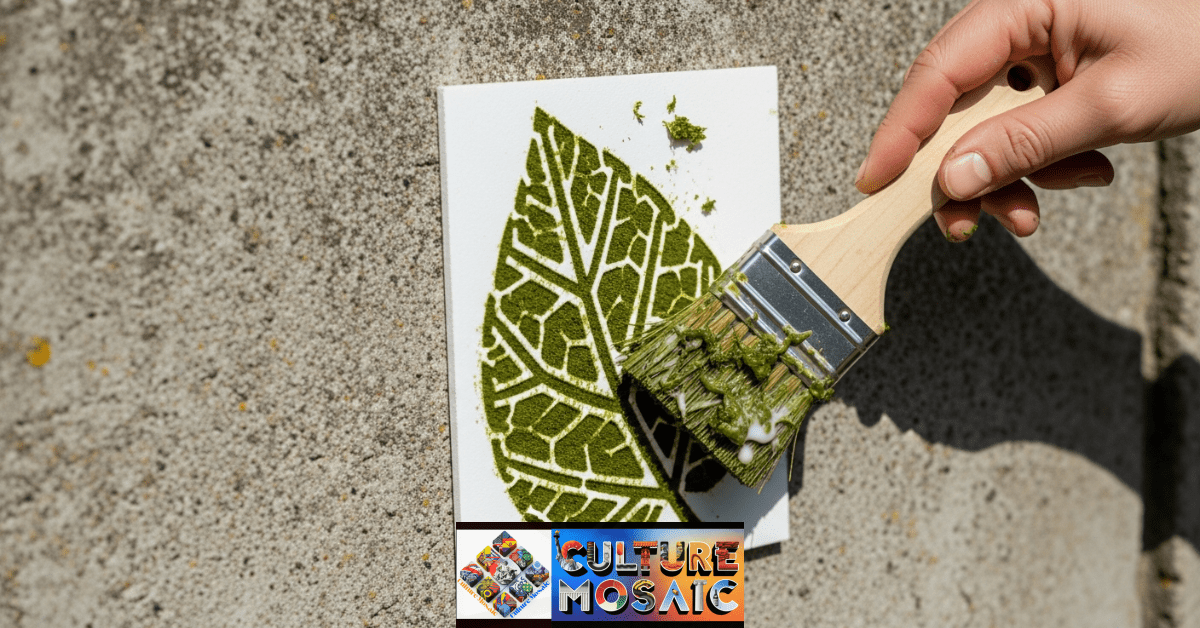
The Stroke Technique: Dab, Don’t Paint
This is where moss graffiti separates from traditional painting, and where most people’s instincts work against them.
Your goal isn’t to paint the surface—it’s to force the emulsion into the concrete’s porous structure. I use a two-inch chip brush with stiff bristles. I load it generously with emulsion, then approach the wall with a perpendicular dabbing motion, pushing the bristles directly into the surface.
Imagine you’re trying to push the mixture into tiny holes and crevices, because that’s exactly what you’re doing. Those pores provide moisture retention and anchor points for the developing rhizoids.
Swiping or brushing creates a thin surface layer that dries quickly and flakes off easily. I’ve seen beautiful moss graffiti designs that someone clearly spent hours on, all sliding down the wall in sheets after the first heavy rain because they painted instead of dabbed.
I apply two thick coats with a 30-minute rest between them. The first coat should look generously applied but not actively dripping. After 30 minutes, it will have settled into the surface texture. The second coat fills in any thin spots and adds additional thickness for moisture retention.
The Bottom-Up Rule: Working With Gravity
Always start at the base of your design and work upward. I learned this watching my first attempt slowly migrate downward as gravity pulled wet emulsion from upper sections.
Starting at the bottom serves multiple purposes. First, it catches the inevitable drips and incorporates them into your design rather than letting them create unplanned streaks across bare wall. Second, it builds up texture progressively—thicker at the base where moisture naturally accumulates, thinner toward the top where it dries faster. This variation actually mimics natural moss growth patterns.
For designs taller than three feet, I work in horizontal sections, completing the bottom third and letting it set for an hour before moving to the middle section, then the top. This prevents the weight of fresh emulsion from pulling earlier applications downward before they’ve adhered.
Phase 4: Stewardship (Post-Care)
The First 72 Hours: The Critical Window
Everything you did in the previous phases can be undone by poor aftercare in the first three days. This is when moss fragments are most vulnerable—they’ve been mechanically damaged by blending, they’re establishing in a new location, and they’re fighting to anchor before the emulsion dries completely.
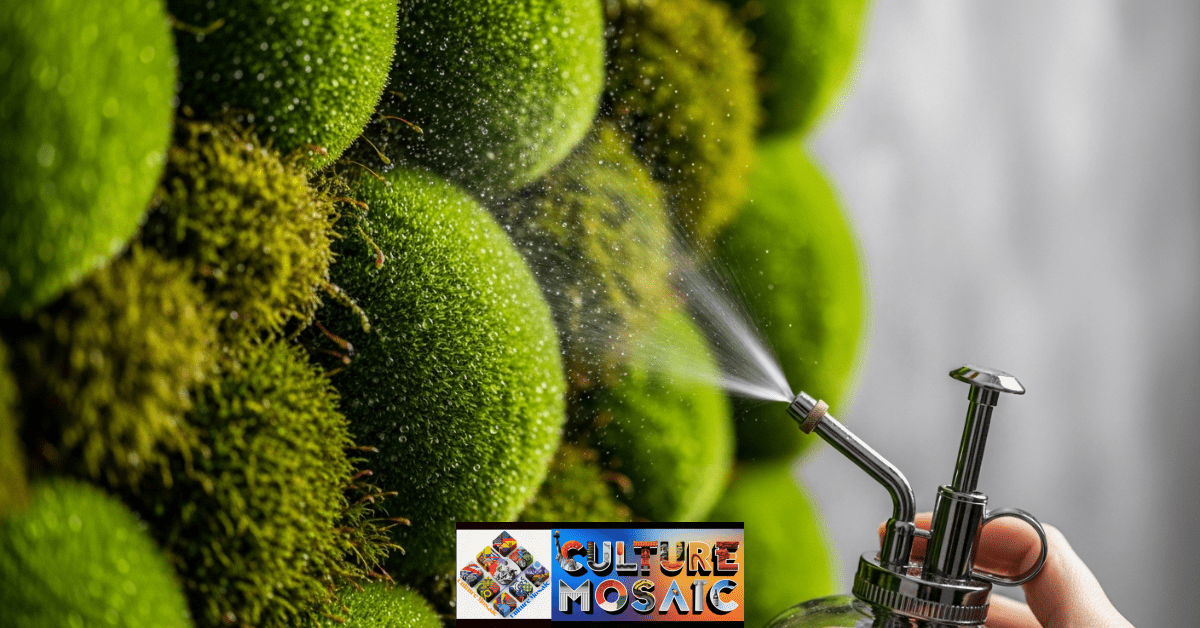
Day 1-2: I mist lightly every 4-6 hours if the weather is dry. The key word is “lightly.” You want the surface glistening with tiny water droplets, not streaming with water. Too much water washes away your emulsion before the moss can grab hold.
I use a simple pump spray bottle set to fine mist, not jet stream. I spray from about two feet away, creating a gentle fog rather than direct impact. Each misting session takes about 30 seconds for a typical design.
Day 3: By this point, I can usually tell if the moss is taking hold. Healthy moss appears dark green and the emulsion looks settled rather than fresh. I reduce to twice-daily misting—once in early morning, once in evening.
I avoid midday misting entirely. Water droplets on moss in direct sunlight act as tiny magnifying glasses, focusing light and scorching the delicate tissue underneath. Early morning and evening misting coincides with higher humidity and lower light intensity.
If rain is forecast during these first 72 hours, I actually celebrate. Natural rain provides ideal moisture without the risk of over-application. If heavy downpours threaten, I’ll rig temporary protection—a sheet of plastic held six inches away from the wall with stakes or lumber, positioned to diffuse the rain’s impact while allowing airflow.
The Establishment Phase: Weeks 2-8
After the first week, the trajectory becomes clear. Successful moss installations show deep green coloration and start spreading slightly beyond their original boundaries. The emulsion takes on a more integrated appearance, looking less like applied paint and more like natural growth.
Failed installations turn brown or gray, develop white fuzzy mold, or begin flaking away from the surface. When I see these signs, I diagnose immediately:
Brown moss: Usually indicates too much sun exposure or insufficient water during establishment. If caught early, I can sometimes save it by rigging shade cloth and increasing misting frequency.
White fuzzy growth: This is mold, caused by too much water and poor air circulation. I stop misting completely, let the surface dry for three full days, then gently brush away the mold and resume watering at reduced frequency.
Flaking: This means the emulsion never properly adhered, usually because the surface was too smooth, too dusty, or the dabbing technique wasn’t aggressive enough. I reapply emulsion to affected areas, this time with heavier pressure.
For thriving installations, I gradually reduce watering. By week four, I’m usually down to every-other-day misting. By week eight, I’m transitioning to weekly watering, then letting natural rainfall take over completely.
The Wintering Process: Understanding Dormancy
The first time I watched one of my moss graffiti installations turn completely brown in late November, I thought I’d killed it. I hadn’t. I was watching it enter dormancy, which is moss’s survival strategy for harsh conditions.
During winter dormancy or summer drought, moss essentially shuts down. It releases most of its water content, goes brown, and can remain in this suspended state for months. To an untrained eye, it looks dead. It’s not.
This seasonal shift is something you need to prepare clients or property owners for if you’re doing this professionally. I always explain that living art has cycles. The piece will look less impressive during dormancy, but that’s part of working with living systems.
When favorable conditions return—spring warmth and rain, or autumn moisture after summer drought—dormant moss revives within days. I’ve watched brown patches transform to vibrant green literally overnight after the first good rain of spring. It’s remarkable every single time.
To accelerate spring awakening, I resume light misting when nighttime temperatures stabilize above 45°F. The combination of moisture and warmth signals the moss to break dormancy early.
The Legacy Check: Professional Documentation
I photograph every installation monthly from the same position and angle. After a year, I have twelve images showing the complete annual cycle—establishment, summer growth, autumn peak, winter dormancy, and spring revival.
This documentation serves multiple purposes. It demonstrates to potential clients what realistic expectations look like. It helps me refine techniques by comparing what worked versus what struggled. And honestly, it’s personally satisfying to watch these living murals evolve over time.
I keep a simple spreadsheet tracking: application date, moss species used, wall orientation, recipe variations, weather during establishment, and long-term survival. After eight years, this database helps me predict success rates based on specific conditions.
Some of my installations have thrived for six years with zero maintenance. Others failed within three months despite my best efforts. The documentation helps me understand what drives those different outcomes.
Moss Graffiti Tutorial: Common Challenges I’ve Encountered (And Solved)
When Moss Won’t Establish Despite Perfect Technique
I’ve had installations fail even when I did everything right. Usually the culprit is one of three things: the moss was already stressed before collection, the wall surface had invisible contamination, or micro-climate conditions were more hostile than my assessment suggested.
My solution now includes a test patch. Before committing to a large design, I apply a six-inch square of emulsion and monitor it for two weeks. If it establishes well, I proceed. If it struggles, I abandon that wall and find a better location.
Algae and Mold Competition
Sometimes you create conditions so favorable that you feed more than just moss. Green slime algae or white fuzzy mold can colonize your installation, competing with or even overgrowing your intended moss.
I reduce watering immediately when I see this. Algae and mold need constant moisture. Moss tolerates dry periods better than these competitors. I let the surface dry completely for three days, gently brush away the unwanted growth, then resume watering at half the previous frequency.
Vandalism and Property Owner Concerns
Unlike spray paint graffiti, moss art is easy to remove—which makes it vulnerable. I’ve had pieces scrubbed away by property owners who didn’t understand what they were looking at, and pieces destroyed by vandals who just wanted to mess with something.
Location selection matters enormously. Pieces on private property with explicit owner permission last longest. Public installations benefit from small interpretive signs: “Living Bio-Art Installation: Please Leave Undisturbed.”
I’ve also learned to choose walls that aren’t prime targets for competing graffiti artists. A moss piece on a wall that gets tagged constantly won’t survive.
Advanced Techniques After You’ve Mastered the Basics: Moss Graffiti Tutorial
Multi-Species Layering
Once you’re comfortable with basic application, try combining different moss species in a single design. I use cushion moss for raised, textural areas and sheet moss for flat coverage. The different growth rates and textures create depth that single-species installations lack.
The technique requires applying different emulsions separately—sheet moss in one section, cushion moss in another, with clean boundaries between them. Each species responds differently to seasonal conditions, creating dynamic shifts throughout the year.
Integrated Vertical Gardens
Some of my more ambitious projects integrate drought-tolerant sedum plants with moss, creating vertical gardens rather than pure moss graffiti. This requires a different structural approach—wire mesh pockets filled with growing medium, installed first, then moss emulsion applied around them.
These mixed installations handle sun exposure better because sedums thrive in conditions that stress moss. But they’re significantly more complex and move beyond the scope of a standard moss graffiti tutorial.
Frequently Asked Questions About Moss Graffiti Tutorial
Q: How long does moss graffiti actually last?
A: In ideal conditions—shaded location, adequate rainfall, minimal disturbance—I’ve had installations thrive for six to seven years. Average lifespan is three to four years. Exposed locations with marginal conditions might only last one season.
Q: Is moss graffiti legal?
A: Only on property where you have explicit permission. On your own property, obviously legal. On public or others’ private property without permission, it’s vandalism regardless of environmental benefits. I always get written permission for professional installations.
Q: What season should I apply moss graffiti?
A: Spring and fall are optimal—moderate temperatures, reliable rainfall, minimal stress. I avoid summer heat and winter freezes entirely. In temperate climates, late September through October gives moss time to establish before winter dormancy, leading to explosive spring growth.
Q: Can I use any moss species?
A: Technically yes, but success varies wildly. I use moss species already growing locally on similar surfaces. Urban-adapted moss transplants far more successfully than forest species. Common sheet moss and cushion moss work reliably in most applications.
Q: Does moss damage buildings?
A: No. Moss attaches superficially through rhizoids—tiny hair-like structures that grip texture but don’t penetrate structural materials. Unlike ivy with invasive roots, moss actually protects surfaces from erosion and temperature fluctuations. It’s easily removed if needed.
Final Thoughts From Someone Who Does This Professionally: Moss Graffiti Tutorial
I’ve completed about 300 moss graffiti installations now, from Seattle to Austin, from community gardens to corporate campuses. Plenty of them failed spectacularly. A downtown Phoenix piece I was particularly proud of turned brown within two weeks despite daily misting. A simple fern design on a Seattle alley wall, which I thought might last a season, just celebrated its sixth year.
This moss graffiti tutorial is what I needed eight years ago when I was standing in my backyard with a blender full of buttermilk and moss, following vague internet instructions that left out half the important details. I’ve tried to include the specifics that actually matter—the stuff you only learn by screwing up a few times.
Your first attempt will probably be messy. Mine looked like someone threw green yogurt at a wall. The edges were fuzzy, the coverage was patchy, and I’d used way too much emulsion in some spots while missing entire sections in others. I was convinced I’d wasted an entire Saturday.
Then week three happened, and those sloppy patches started connecting. By week five, you couldn’t tell where I’d messed up. The moss filled in gaps on its own and created patterns I never planned. That’s when I understood this medium works differently than anything else I’d tried.
Start with something simple. A basic geometric shape or your initials on a backyard wall. Get comfortable with how the emulsion behaves, how your local moss responds, how the weather in your specific area affects establishment. Once you nail a small piece, scale up.
The thing about moss graffiti that still surprises me: you’re not really making art in the traditional sense. You’re starting something and then letting it become what it wants to become. The moss grows where conditions suit it, thickens in areas that hold moisture, spreads beyond your original lines if the surface allows it.
That lack of complete control frustrated me initially. Now it’s what I love most about this work.
Get a bucket. Mix your first batch following this moss graffiti tutorial. Find a wall that won’t get you arrested. Push that emulsion into the surface like you mean it. Then step back and watch biology take over.
The moment you see those first bright green shoots emerging from what looked like dried mud—that’s when you’ll get it.