My grandmother didn’t own a pH meter or a lab coat. She had a stoneware crock, a wooden pounder, and a deep, intuitive understanding of the seasons. These secrets aren’t written in textbooks. They are carved into the memories of those who have preserved the harvest for generations. Here are five essential tips for making sauerkraut that has a rich, historic flavor.
What Traditional Sauerkraut Fermentation Really Means
You walk into my fermentation lab and I’ll show you temperature charts, bacterial counts, pH curves. Walk into my kitchen and I’ll show you my grandmother’s crock, forty years old, never touched by soap. Both tell the same story, just in different languages.
Traditional sauerkraut fermentation transforms raw cabbage through a microbial succession. First come the Leuconostoc bacteria, appearing within hours of packing your crock. They drop the pH fast, creating an environment where Lactobacillus plantarum can take over and finish the job. This handoff between bacterial species happens whether you understand it or not. Your job is just to create the conditions where it can happen properly.
The whole process rests on salt pulling water from cabbage cells, creating brine where oxygen can’t reach. Lactobacillus doesn’t need air. Mold does. Keep everything under that brine and you’re halfway to success.
Secret 1: The Weight of the Season: Traditional Sauerkraut Fermentation
Why October Cabbage Beats June Cabbage Every Time
I’ve tested this in the lab and tasted it in the crock. Late-season cabbage, the heads you pull after the first frost, ferment differently than spring cabbage. The numbers explain why: sugar content climbs as temperatures drop. That cabbage sitting in cold October soil concentrates sugars that feed the Leuconostoc and Lactobacillus strains you need.
Spring cabbage tastes sweet when you eat it fresh. It’s tender, mild, built for salads. But those same qualities make it wrong for fermentation. The leaves hold less moisture. The sugars run thin. You end up with limp kraut that tastes flat.
My grandmother didn’t know about Brix measurements or sugar concentration. She just knew that her best batches came from the last harvest, when the air had turned cold and the cabbage felt dense in her hands. Science caught up with what she already understood.
The Heft Test
Pick up a cabbage head. Really pick it up, weigh it in your hands. The right head will surprise you. It’ll feel heavier than it should for its size. That weight comes from tight cell structure, minimal air pockets, maximum water content locked inside those leaves.
When you slice into good cabbage, your knife meets resistance. The head doesn’t crumble or separate easily. The cut surface looks wet immediately, juice beading up where the blade passed through. That’s the moisture you’re after, the liquid that will become your brine.
Skip the damaged heads, the ones with soft spots or splits. You want battle scars on the outer leaves, sure. Those tell you the cabbage grew in real dirt, faced real weather. But the core needs to be solid, compact, ready to release its liquid when you work it with salt.
Those Outer Leaves Aren’t Garbage
Strip off the truly torn or dirty outer leaves. But save three or four of the biggest, cleanest ones. These become your cap, the layer between your shredded cabbage and whatever weight you use.
This trick doesn’t appear in modern recipes much. They tell you to use parchment or cheesecloth, which work fine. But cabbage leaves are easier to handle, easier to remove when you check your ferment, and they catch any loose shreds that try to float up. Plus your grandmother would recognize what you’re doing.
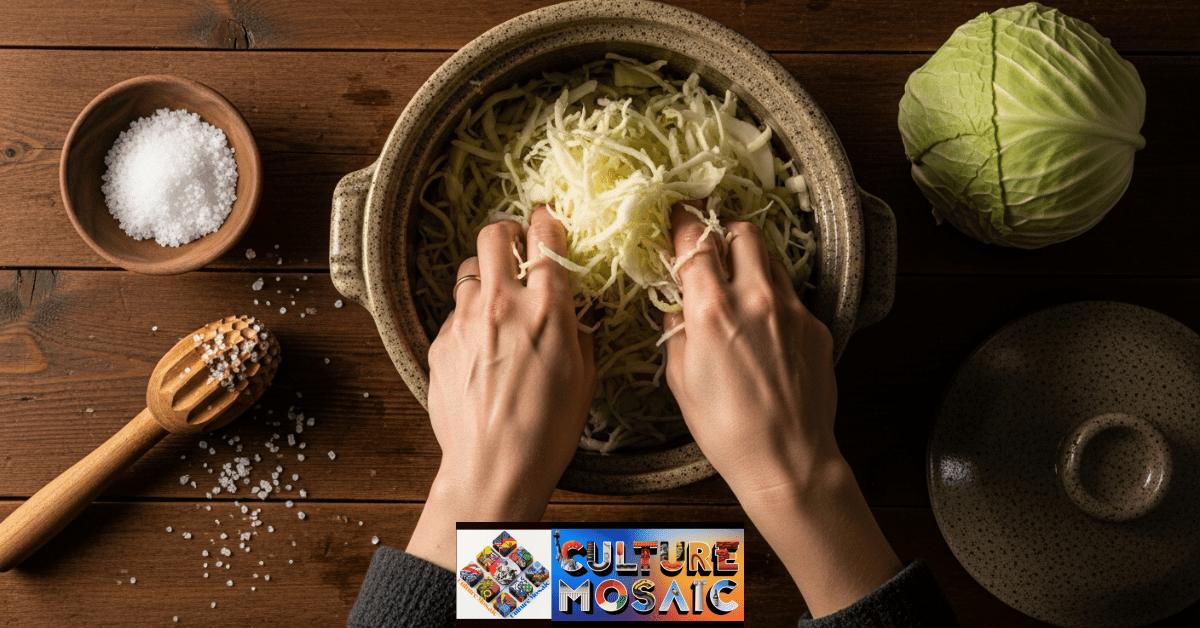
Secret 2: The Alchemy of the Massage: Traditional Sauerkraut Fermentation
When Physics Becomes Cooking
You add salt to shredded cabbage at about three tablespoons per five pounds. The ratio matters, but the technique matters more. This isn’t mixing. This is controlled destruction of plant cells, and if you understand what’s happening at the cellular level, you can feel when you’ve done enough.
Salt creates osmotic pressure across cell membranes. Water moves from inside the cabbage cells toward the higher salt concentration on the outside. The cell walls weaken. Your hands pressing and squeezing break those weakened walls, releasing the water trapped inside. Chemistry and mechanics working together.
Most people rush this. They mix for two minutes, see a little liquid, and call it done. Then they wonder why their cabbage floats, why they need to add emergency brine, why the texture comes out wrong.
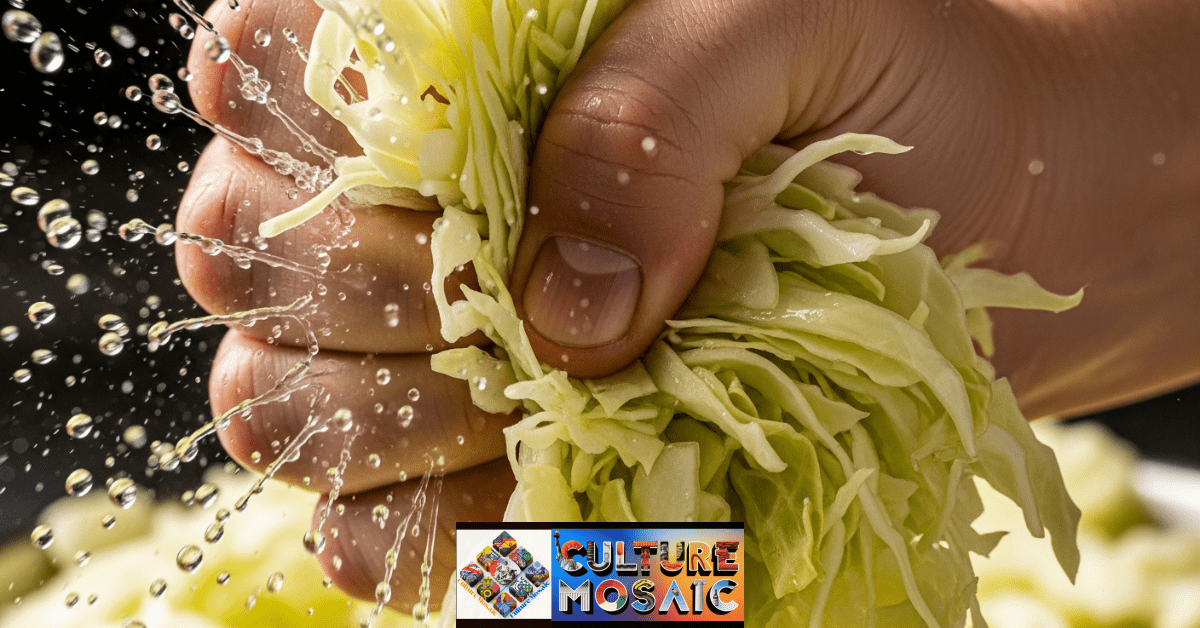
Listen to Your Cabbage
Take a handful of salted cabbage and squeeze it. At first you hear a dry crunch, like stepping on autumn leaves. The cabbage resists, stays rigid, doesn’t give much. Keep working it. Squeeze harder. Rotate to a different spot. Come back to the same handful.
After several minutes, the sound changes. The crunch softens into a squeak, almost like fresh cheese curds when you bite them, or very cold snow being packed. That squeak signals the shift from intact cells to ruptured ones. The cabbage has given up its water.
If you don’t hear that sound change, you haven’t worked the cabbage enough. Simple as that.
The Twenty-Minute Secret
Here’s what separates decent fermenters from good ones: patience at the start. Mix your salt through the shredded cabbage. Then walk away. Set a timer for twenty minutes. Go do something else.
Osmosis works whether you’re standing there or not. That salt draws water through cell membranes continuously. When you come back, the cabbage will be sitting in a pool of its own liquid, already half-wilted, much easier to work. Now when you massage and pound, you’re not fighting rigid structure. The cabbage cooperates.
This rest period cuts your working time in half and produces better results. My grandmother did this naturally, working in batches, letting each batch sit while she shredded the next head. She wasn’t timing anything. She was just following a rhythm that happened to match the chemistry perfectly.
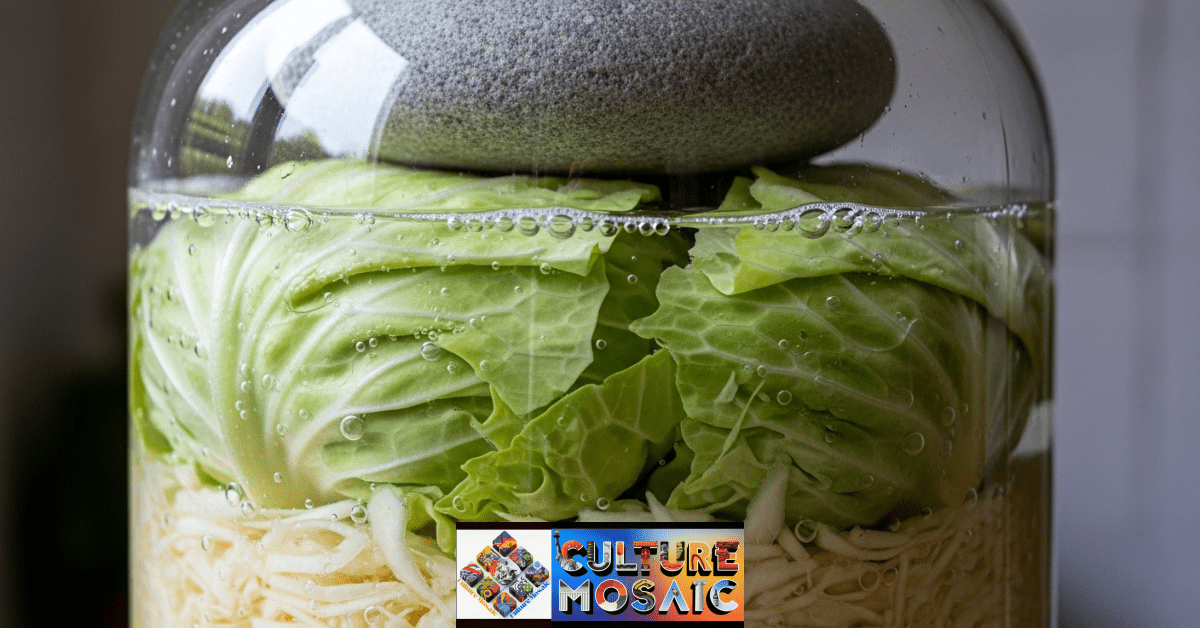
Secret 3: The Brine-Over-Everything Rule: Traditional Sauerkraut Fermentation
Why This Matters More Than Anything Else
Under the brine, all is fine. Above the brine, you get mold. The microbiology is straightforward. Lactobacillus thrives without oxygen. Mold and kahm yeast need oxygen. Your brine creates an anaerobic zone where the bacteria you want can work and the organisms you don’t want can’t survive.
Every piece of cabbage must stay submerged. Not mostly submerged. Not pushed down when you check it. Continuously underwater from the moment you pack the crock until you move it to cold storage.
I’ve seen people obsess over airlock valves and fancy fermentation systems while their cabbage floats freely underneath. The airlock doesn’t matter if your cabbage isn’t submerged. The weight matters. The brine level matters. Everything else is secondary.
The Weight That Actually Works
Traditional fermenters used river stones, carefully chosen, scrubbed clean, reserved only for this purpose. Those stones got used year after year, developing their own bacterial colonies. Modern glass weights work fine, but they lack that accumulated history.
Whatever you use needs to fit snugly in your vessel. Gaps around the edges let cabbage escape upward. The weight should be heavy enough that even when carbon dioxide bubbles try to lift everything, the cabbage stays down.
I use both in my kitchen. The stones for batches where I want that traditional character. Glass weights when I need to see what’s happening underneath, or when I’m teaching someone who doesn’t yet understand what properly weighted cabbage looks like.
When Your Cabbage Runs Dry
Sometimes the massage doesn’t produce enough liquid. You’ve worked the cabbage properly, heard the squeak, waited the full time, and still the brine barely covers the shreds. This happens with storage cabbage that’s been sitting for months, or with naturally drier varieties.
Don’t panic. Mix emergency brine using the two percent solution: twenty grams of salt per liter of water. That’s roughly one and a half tablespoons per quart if you’re not weighing things. Boil it, cool it completely, then add just enough to submerge your cabbage.
Critical point: that brine must be fully cooled. Hot water kills Lactobacillus. You’re trying to create an environment where these bacteria can work. Dumping boiling water on them defeats the entire purpose.
Secret 4: The Cool Dark Truth: Traditional Sauerkraut Fermentation
Fast Fermentation Is Overrated
Room temperature fermentation at seventy-two degrees gives you active bubbling within a day. The whole process finishes in three weeks. Beginners love this because they see results quickly, feel like they’re doing something right.
But speed costs you. The cabbage softens more than it should. The flavor develops less complexity. You lose some of that characteristic snap. The kraut works, sure, but it doesn’t taste like the stuff my grandmother made.
She fermented in a stone basement where the temperature stayed around fifty-eight degrees year-round. The first batch she packed each fall wouldn’t be ready until Christmas. By February, when the last jars got opened, the kraut had developed layers of flavor you can’t rush.
The Fifty-Nine-Degree Sweet Spot
Fifteen degrees Celsius is fifty-nine Fahrenheit. If you can maintain that temperature, you’ve found the range where traditional sauerkraut fermentation produces its best results. The bacterial succession happens more slowly. Different Lactobacillus strains get time to contribute. The final product has complexity you can taste.
The cabbage keeps more crunch. The sourness builds gradually, letting different acid notes emerge. You taste the difference between this and rushed kraut immediately. One tastes like tradition. The other tastes like you were in a hurry.
Not everyone has a basement that maintains this temperature naturally. I use a temperature-controlled chamber for my research batches. At home, I use the coolest closet in the house and accept that summer batches will ferment faster than winter ones. That seasonal variation is part of the tradition anyway.
Working with the Seasons
Summer heat speeds everything up. If your kitchen hits eighty degrees, you need to move your crock somewhere cooler. I’ve seen people use spare refrigerators set to their warmest setting, or stick fermentation vessels in coolers with frozen water bottles swapped out twice a day.
Winter can be too cold. Below fifty degrees, Lactobacillus slows down dramatically. Below forty, fermentation essentially stops. If your storage area is unheated, you might need to bring your crock to a warmer spot, or accept that winter batches will take three months instead of six weeks.
My grandmother worked with these temperature swings naturally. Her September batches fermented faster, tasted sharper. Her November batches took longer, developed more depth. She treated these as features, not problems, because she understood the rhythm of the seasons and the microbes.
Secret 5: The Stewardship of the Crock: Traditional Sauerkraut Fermentation

Why My Grandmother’s Crock Made Better Kraut
That stoneware crock sat in the same basement corner for four decades. My grandmother rinsed it with hot water after each batch, wiped it dry, never once used soap on the interior. I didn’t understand why until I started studying biofilms.
Unglazed ceramic develops bacterial colonies on its surface. These aren’t harmful organisms. They’re beneficial Lactobacillus strains that survived from previous fermentations. Each batch adds to this invisible layer, creating a vessel that carries forward successful microbes from year to year.
We call this seasoning when it happens to cast iron skillets. Same principle applies to fermentation vessels. That old crock was inoculating new batches with proven bacteria, giving each fermentation a head start.
Wood does this too. Traditional tampers and lids made from hardwood harbor their own bacterial populations. When you pound cabbage with a wooden tamper that’s been doing this job for years, you’re introducing microbes from past successes.
The Legacy Journal
Keep a notebook next to your fermentation station. Write down the date you started each batch, the weight of cabbage, the salt ratio, any variations you tried. But also record things that seem irrelevant.
Was it a dry autumn or wet? How did the cabbage feel when you massaged it? What else was happening that week? These details matter less for the fermentation chemistry and more for the story you’re building.
I can flip through my grandmother’s journal and see her entry from the week my mother was born. The kraut was too salty, she noted, because she was distracted, moving faster than usual. That batch is long gone, but the memory stays in the journal.
Years from now, you’ll have your own pages like this. The batch you made during a heat wave when the basement flooded and you had to improvise. The autumn when the frost came early and the cabbage was perfect. These records connect you to time differently than calendar dates.
How the Science Supports the Tradition: Traditional Sauerkraut Fermentation
When cabbage ferments, several Lactobacillus species work in sequence. Leuconostoc mesenteroides shows up first, working fast to drop the pH below 4.5. This creates conditions where L. plantarum can take over and finish pushing the acidity down to 3.5 or lower.
Different bacterial strains dominate at different temperatures and stages. Cooler temperatures favor species that produce more complex flavor compounds and preserve better texture. Warmer fermentation speeds up the timeline but lets fewer species contribute meaningfully.
Salt concentration controls everything. Too little salt and spoilage organisms get a foothold before Lactobacillus can establish itself. Too much salt slows Lactobacillus so severely that fermentation stalls. That three tablespoons per five pounds ratio, roughly 2.5 percent by weight, creates the environment where beneficial bacteria thrive and harmful ones can’t compete.
All of this happens whether you understand the microbiology or not. Your grandmother didn’t need to know the names of the bacterial species. She just needed to recognize the signs of successful fermentation: the smell, the bubbles, the gradual development of sour flavor, the texture of properly fermented cabbage.
The Questions Everyone Asks: Traditional Sauerkraut Fermentation
Getting the Salt Right
Three tablespoons of non-iodized salt per five pounds of cabbage. That’s your baseline, the ratio that’s been tested by centuries of fermenters and confirmed by decades of food science research. You can adjust slightly based on preference, but stay between 2 and 3 percent salt by weight.
Never use iodized salt. The iodine interferes with bacterial growth. Elevate your culinary creations by reaching for kosher salt, sea salt, or pickling salt for that perfect seasoning! Avoid anything with anti-caking agents, which cloud your brine and can affect flavor.
Knowing When It’s Ready
Start tasting after two weeks. Use a clean fork to pull a sample from beneath the brine. Early on, the kraut tastes only mildly sour, still quite crunchy. As fermentation progresses, the sourness deepens and the texture softens slightly.
When it tastes right to you, it’s ready. My grandmother never tested pH. She tasted her kraut regularly, learning to recognize the progression from barely fermented to properly sour. You’ll develop this same sense if you pay attention.
Dealing with Surface Film
White film on top is usually kahm yeast, harmless but unappetizing. It indicates that some cabbage escaped the brine or that your temperature has been inconsistent. Simply scoop it away with a pristine spoon for a perfect finish!. The kraut underneath is fine.
I see kahm more often in summer batches, where warmer temperatures give yeast more opportunity to grow. Another reason to ferment cool when you can.
Adding Other Ingredients
Absolutely. Caraway seeds, juniper berries, apples, carrots, beets, garlic—different regions have different traditional additions. The foundation stays the same: cabbage and salt. Everything else is variation on the theme.
Use restraint with spices. A tablespoon of caraway seeds per five pounds of cabbage adds flavor without overwhelming the fundamental kraut character. For other vegetables, keep them under twenty percent of your total weight. You’re making sauerkraut, not mixed vegetable ferment.
How Long It Keeps
Properly fermented kraut keeps for months, even years. Once it reaches your preferred level of sourness, move it to cold storage. A refrigerator works perfectly. So does a root cellar or unheated basement.
The cold slows fermentation dramatically but doesn’t stop it entirely. Your kraut will continue developing slowly, becoming more sour over time. As long as it stays submerged and cold, it stays safe. Trust your senses. If it captivates your senses with an irresistible scent and a mouthwatering taste, you can be certain it’s something truly exceptional!
Traditional Sauerkraut Fermentation: Making It Your Own
So you’ve got five secrets now. Pick the right cabbage. Work it properly with salt. Keep everything under brine. Find a cool spot. Respect your vessel. None of this is complicated, but it all matters.
Your first batch won’t be perfect. Mine wasn’t. I oversalted it, got impatient, checked it too often. It still tasted better than anything I could buy. The second batch was better. The tenth batch was when I stopped worrying and started trusting what my hands were telling me.
That’s traditional sauerkraut fermentation in practice. You learn by doing. The cabbage you get in March behaves differently from October cabbage. A warm week in September speeds everything up. You adjust, make notes, remember what worked. Pretty soon you’re not following recipes anymore. You’re responding to what the fermentation shows you.
Start this week if you can. Get a cabbage, some salt, a jar or crock. Work it until you hear that squeak. Pack it down. Make sure the brine covers everything. Put it somewhere cool. Check it in two weeks. Taste it. Wait longer. Taste again. When it’s right, you’ll know.
Years from now you’ll make a batch and realize you’re doing something your hands remember but your brain doesn’t. That’s when you’ve learned it. Not from this article or any other. From the cabbage itself, from the rhythm of the seasons, from the quiet satisfaction of opening a jar that tastes like time and patience.
Traditions don’t survive because somebody wrote them down perfectly. They survive because people keep doing them, making small adjustments, passing along what works. Every grandmother’s crock in Central Europe carried slightly different bacteria, produced slightly different flavor. All of them were right. Now your kitchen joins that tradition.
Frequently Asked Questions About Traditional Sauerkraut Fermentation
What type of cabbage is best for traditional sauerkraut fermentation?
Grab late-season cabbage, the kind you harvest after the first frost hits. Those heads sit in cold soil and pack on sugars. The leaves get dense, hold more moisture. When you ferment them, the bacteria have more to work with. Spring cabbage is too tender, too watery, wrong for this. Pick a head that feels surprisingly heavy when you lift it. That weight tells you everything.
How long does traditional sauerkraut take to ferment?
Depends entirely on where you keep it. Warm kitchen at seventy-two degrees? Three weeks, maybe four. Cool basement at fifty-eight? Two months easily, sometimes longer. I’ve had winter batches go three months. Don’t trust the calendar. Trust your tongue. Start tasting at two weeks. When it tastes right, move it to cold storage. Simple as that.
Do I need special equipment for traditional sauerkraut fermentation?
You need a container, salt, and something heavy to hold the cabbage underwater. That’s it. A fancy crock is nice but not necessary. A gallon jar works fine. I’ve seen people use food-grade buckets, enamel pots, even large bowls covered with plates. My grandmother’s stoneware crock is beautiful and I love using it, but the cabbage doesn’t care. Get the technique right and the container almost doesn’t matter.
Why must the cabbage stay under the brine?
Because mold needs oxygen and Lactobacillus doesn’t. Your brine keeps air away from the cabbage. Anything poking above the surface gets exposed, starts growing white fuzz or weird film. Everything underneath stays clean, stays safe, ferments properly. I’ve never seen a batch go bad that stayed fully submerged. I’ve seen plenty of batches develop problems when cabbage floated up. Keep it under. Check it regularly. Add more brine if levels drop.
Can I speed up the fermentation process?
Sure, ferment warmer. You’ll get sour cabbage in three weeks instead of eight. But you’ll lose something. The texture goes softer. The flavor stays simpler, more one-note. Slow fermentation at cool temperatures lets different bacteria take turns, each adding their contribution. You taste the difference immediately. Fast kraut tastes like you rushed it. Slow kraut tastes like you cared enough to wait. Your choice.