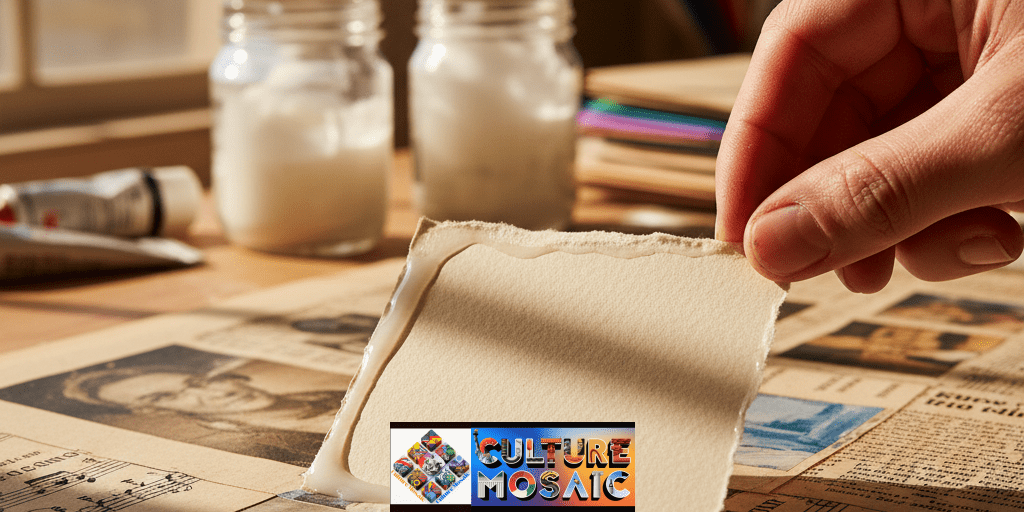
I’ve been making collages for fifteen years, and I can tell you the exact moment I stopped trying to hide my seams. I was working late in my studio, frustrated with how flat everything looked, when I accidentally knocked over a piece I’d been fussing with for hours. When I picked it up, the paper had shifted. You could see where the layers met. The glue caught the overhead light. And it was better. So much better than the “perfect” version I’d been forcing.
That’s what fragmented collage with visible seams is really about. It’s not a trend or a technique you master in an afternoon. It’s a complete shift in how you think about making things. Those edges you used to sand down and blend away? They’re actually doing the most interesting work in your composition. Let me show you what I mean.
Why I Started Leaving My Seams Visible (And Why You Should Too)

Here’s what nobody tells you when you’re starting out: hiding seams takes twice as long as the actual collage. You’re there with your burnisher, your spray adhesive, your patience wearing thin, trying to make everything look like it came out of a printer. And for what?
I spent years doing this. Then I visited a Romare Bearden exhibition and stood inches away from his work. You could see everything. The overlaps. The slightly crooked cuts. Places where the paste had yellowed. And it was magnificent precisely because of these things, not in spite of them.
Fragmented collage with visible seams works because it respects how people actually look at art. Your eye doesn’t glide smoothly across a composition. It jumps. It catches on edges. It follows the path your hands took when you were making decisions. When you leave the seams visible, you’re building that journey right into the work.
What Visible Seams Actually Do
Every seam is a pause. Your viewer’s eye hits that edge and has to make a tiny decision about where to go next. String enough of these together thoughtfully, and you’re choreographing how someone experiences your piece. Blend everything together and you lose that control.
How Fragments Change What People See
I teach workshops sometimes, and there’s this moment that happens with almost every group. Someone will finish their collage, step back, and say “it looks messy.” Then I ask them to photograph it. Suddenly they see what I see—the shadows, the depth, the way light moves across the surface differently than it does across flat work.
Fragmented collage with visible seams photographs incredibly well, which matters if you’re sharing your work online. But more importantly, it exists differently in physical space. A piece with visible seams changes throughout the day as light shifts. Morning sun hits it differently than afternoon light. That’s not something you get with seamless work.
Five Things I Wish Someone Had Told Me About Making Fragmented Collages
1. Your Paper Choices Matter More Than Your Glue Choices
When I’m creating a fragmented collage with visible seams, I spend more time at the paper store than I do actually collaging. You need contrast. Thin against thick. Rough against smooth. Translucent against opaque.
Try this: pair lightweight vellum with heavyweight watercolor paper. The vellum will curl slightly at the edges when you glue it down, creating these delicate shadows. The watercolor paper stays flat and solid. That difference in behavior creates visual interest you can’t get any other way.
Magazine pages have this specific quality where they tear with clean edges but the image continues right up to that edge. Newsprint tears with soft, fibrous edges that catch light. Cardstock gives you architectural precision. Keep a stash of different weights and you’ll never run out of options.
2. Learn to Tear Paper Three Different Ways
Forget your scissors for a minute. The best edges in fragmented collage with visible seams come from tearing, but technique matters.
Tear toward yourself and you get one kind of edge. The paper fibers pull in your direction, creating a feathered effect on the top surface. Tear away from yourself and those fibers stay on the bottom. Neither is better—they’re just different tools.
Marcus’s Pro Tip: Score your line lightly with a bone folder or the back of a butter knife. Not deep enough to cut through, just enough to give the paper a suggestion. Then tear. You get the organic quality of a torn edge with some predictability about where it’s going. I do this for about 60% of my tears—it’s the sweet spot between controlled and spontaneous.
I keep a deckled ruler in my studio for when I want that vintage book page look. It creates consistent “distressed” edges that still feel handmade.
3. Think Like an Architect When You Layer
This is where fragmented collage with visible seams gets three-dimensional. You’re not just arranging flat pieces—you’re building a relief map.
Start with your background pieces flush to the surface. Then add your mid-level fragments with thin adhesive that creates just a whisper of lift. For your focal elements, use foam mounting tape. These pieces will cast real shadows.
Here’s a trick I use: hold your composition up near a light source before you glue anything down. You’ll see exactly where shadows will fall. Sometimes I’ll completely rearrange everything based on what I see in that test.
Don’t be afraid to stack fragments partially on top of each other. Some of my favorite seams happen where three layers meet at different heights.
4. Match Your Adhesive to Your Intention
I have five different adhesives on my work table right now, and I use all of them.
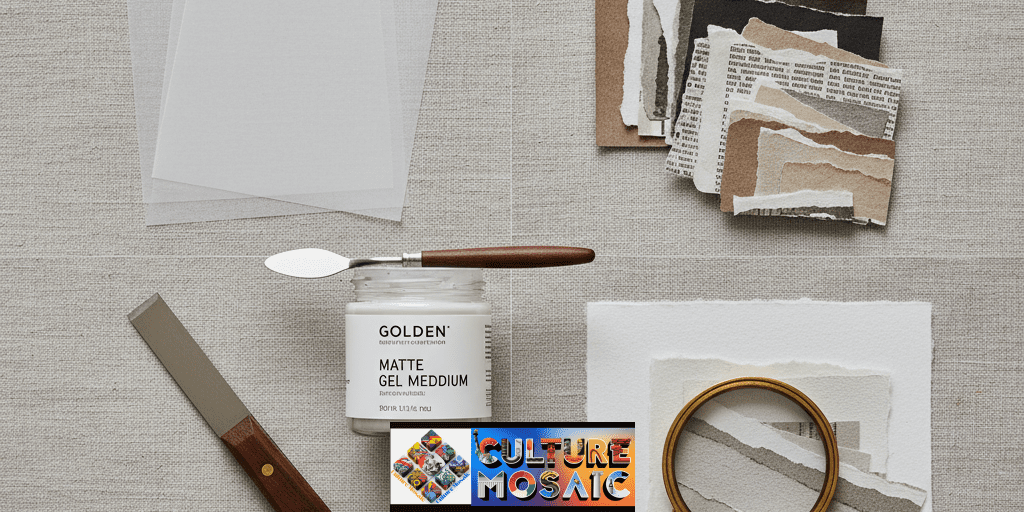
Matte gel medium is my everyday choice. It dries clear, creates minimal elevation, and doesn’t yellow. The slight sheen it leaves at the edges catches light in a subtle way that emphasizes your seams without being obvious about it.
When I want industrial, high-contrast seams, I reach for archival tape. You can get it in different widths, and it creates these bold graphic lines between fragments. Great for geometric work or brutalist compositions.
For experimental pieces, try visible fasteners. Copper staples that will develop patina over time. Waxed thread in contrasting colors. Vintage cloth tape where you can see the adhesive bleeding through the fabric. These aren’t just functional—they become part of your visual vocabulary.
PVA glue (the white stuff from elementary school) still has its place. It’s cheap, reliable, and dries completely flat if that’s what you need.
5. Protect Your Work Without Killing the Texture
This was my biggest struggle when I started making fragmented collage with visible seams. How do you seal it without flattening all that dimensional work you just created?
Spray fixative is your friend here, but technique matters. Light coats from 12 inches away. Multiple passes instead of one heavy coat. Before applying the next layer, let the previous one completely dry. Yes, it takes forever. Yes, it’s worth it.
For pieces that will be handled or shipped, I use a matte varnish applied with a soft brush. Work in sections, following your seams. The varnish will pool slightly at the edges of raised fragments, which actually emphasizes the dimensionality.
If you’re framing, use spacers between the glass and your work. Nothing crushes the spirit of a good fragmented collage like pressed glass flattening all those carefully crafted layers.
Three Approaches I Keep Coming Back To
Your style with fragmented collage with visible seams will evolve as you work, but here are three distinct directions I see working well in my studio and in student work.
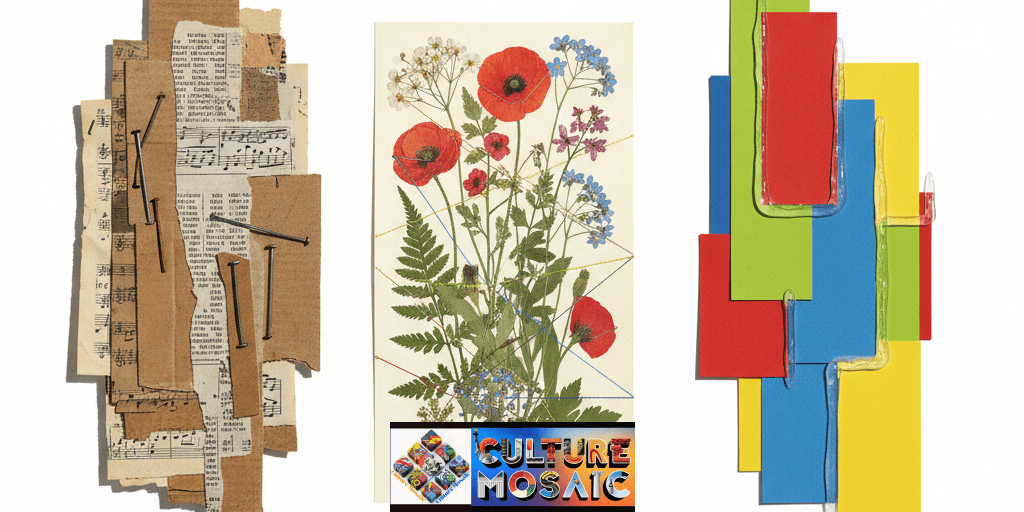
The Brutalist Route
Visual Identity: Raw, industrial, unapologetic
Materials: Heavy newsprint with lots of visible text, corrugated cardboard base, industrial metal staples, thick cloth tape
Seam Character: Aggressive and structural—these seams don’t whisper, they shout
Heavy newsprint, lots of text, industrial staples visible at the corners. This is raw, unapologetic work. I use corrugated cardboard as a base sometimes, tearing pieces so you see the ridges inside. The seams are almost aggressive—thick tape, maybe some exposed thread where I’ve hand-stitched pieces together.
This approach works when you want to make a statement. It’s loud. It doesn’t apologize for being made from scraps. The visible seams here aren’t delicate—they’re structural, almost confrontational.
Best For: Political commentary, urban landscapes, experimental work
The Botanical Method
Visual Identity: Delicate, organic, nostalgic
Materials: Vintage linen paper, pressed flowers and leaves, very thin tissue, wheat paste, embroidery thread in natural colors
Seam Character: Gentle transitions that feel like growth patterns
This is my go-to when I’m working with pressed flowers or natural materials. Vintage linen paper, very thin tissue, actual leaves preserved between layers. The seams are gentle, almost feminine. I use wheat paste or diluted PVA so the adhesive soaks into the paper instead of sitting on top.
For binding, I’ll sometimes use actual embroidery thread in natural colors—cream, soft gray, pale green. The thread becomes another organic element rather than trying to hide itself. When you work with fragmented collage with visible seams in this style, the goal is making the piece look like it could have been found pressed in an old book.
Best For: Nature studies, memory pieces, heirloom-quality work
The Geometric Modernist Take
Visual Identity: Clean, precise, architectural
Materials: Primary colors or limited palettes, sharp-cut edges, clear-drying gel medium, high-quality cardstock
Seam Character: Controlled glossy lines that emphasize geometry
Clean shapes. Primary colors or limited palettes. Sharp edges cut with a fresh blade. This is where precision matters, but the seams are still completely visible—you’re just controlling them more.
I use clear-drying gel from Golden Artist Colors for this because when it catches light, it creates these glossy lines between fragments that emphasize the geometry. Everything overlaps at right angles. The composition is tight, almost architectural.
This style proves that visible seams don’t have to mean loose or organic. You can be just as precise and deliberate as you want while still celebrating the construction.
Best For: Abstract compositions, color studies, minimalist work
What’s Actually on My Work Table
People always ask what supplies they need for fragmented collage with visible seams. Here’s what I reach for constantly:
Deckled Edge Ruler – Makes those vintage book page edges without spending hours tearing by hand. Perfect for botanical work or anything with a nostalgic feel.
Matte Gel Medium by Golden – Golden is my brand, but any quality acrylic medium works. Creates invisible bonds with just enough tooth to catch light at the seams. This is my default for abstract layering.
Archival Tape by Lineco – Lineco makes the best archival-quality tape I’ve found. When you want those high-contrast, graphic seams. Essential for brutalist or street art inspired work.
Precision Scalpel – X-Acto knife with fresh #11 blades. For geometric modernist pieces where your cuts need to be absolutely clean. Change your blade more often than you think you should—I swap mine out every third project.
Bone Folder – Cheap, simple, essential. Scores paper for controlled tearing. Also good for burnishing down edges when you do want something flush. Blick carries reliable ones for under ten bucks.
Foam Mounting Tape – Creates dramatic height differences between layers. Comes in different thicknesses. This is what gives you those real shadows that change as light moves across your work.
You don’t need all of this to start. Honestly, you can make compelling fragmented collage with visible seams using magazine pages, white glue, and your hands. But as you develop your practice, these tools give you more control over exactly what kind of seams you’re creating.
Why This Matters Right Now
I’ve noticed something in the past couple years. At exhibitions, at student shows, in my own practice—there’s this pull back toward work that obviously couldn’t have been made on a computer. Not because digital art isn’t valid, but because there’s value in proof that human hands were involved.
Fragmented collage with visible seams does this automatically. You can fake a lot of things digitally, but you can’t fake the way glue catches overhead lighting. You can’t replicate the exact shadow pattern created by three layers of paper at different heights. These physical properties resist simulation.
When I post work online, people often comment on the texture. They want to know what it would feel like to touch. That’s the power of visible seams—they create desire for physical interaction even through a screen.
The Part Where Nothing Lines Up Perfectly
Here’s what I tell students who are frustrated that their fragmented collage with visible seams doesn’t look “professional”: the imperfect part is the professional part. Those seams that don’t quite line up? That’s your signature. The spot where you can see you changed your mind and overlapped another piece? That’s the story.
I have pieces where you can clearly see I tore something wrong and had to make it work anyway. Those pieces sell. People connect with them because they can see the problem-solving, the humanity in the process.
Your seams are the most honest part of your work. They show where you made decisions. They reveal what you tried and what you settled on. Don’t hide them. Build your whole practice around them. Make them the point.
FAQs About Fragmented Collage With Visible Seams
Q: How do I know if my seams look intentional instead of just sloppy?
A: If you can answer why a seam is where it is, it’s intentional. I’m serious. “I put this seam here because it guides the eye toward the focal point” is intention. “I don’t know, I just stuck it there” is sloppiness. The physical quality matters less than your reasoning.
Q: Can I get this look working digitally?
A: You can approximate it, but you’ll lose what makes fragmented collage with visible seams special—the physical dimension. Real shadows change as light moves. Real paper has texture you can feel. Digital can reference this aesthetic, but it can’t replicate the material presence.
Q: I’m new to collage. What adhesive should I buy first?
A: Start with basic matte gel medium. Get a small jar, experiment with it. It’s forgiving, dries clear, gives you time to reposition things. Once you understand how it behaves, branch out to tapes and specialty adhesives. Don’t overthink the beginning.
Q: How do I photograph my work so people can actually see the dimension?
A: Light it from the side. Seriously, that’s 90% of it. Straight-on lighting flattens everything. Set up near a window where light comes in at an angle, or use a desk lamp positioned at 45 degrees. Take photos at different times of day. The same piece will look completely different in morning light versus late afternoon.
Q: Should every seam in my composition be equally visible?
A: No, and this is important. Vary your seam prominence. Some should be subtle transitions that keep the flow moving. Others should be focal points that stop the eye completely. If every seam screams for attention, none of them get it. Think of it like rhythm in music—you need variation.
About the Author
Marcus Chen is a mixed-media artist and collage instructor based in Portland, Oregon. With fifteen years of experience in tactile art and digital composition, Marcus has exhibited work in galleries across the Pacific Northwest and teaches workshops on contemporary collage techniques. His work focuses on the intersection of traditional craft methods and modern aesthetic sensibilities, with particular emphasis on fragmented collage with visible seams as a form of authentic artistic expression.
View Marcus’s portfolio | Subscribe to workshop updates