
This was supposed to be a masterpiece. It became a biohazard.
I’m staring at a petri dish covered in fuzzy black mold. Three weeks of work, gone. The slime mold I was cultivating died somewhere around day four, and everything else moved in to fill the space. This is my third failed attempt this month.
If you’re reading this, you’ve probably killed a few cultures yourself. Good. That means you’re actually doing bio-art, not just thinking about it. I’ve been working with living organisms as art materials for three years now, and honestly, I’ve screwed up more dishes than I’ve saved. But those screwups taught me what actually matters.
Here are the 5 bio-art mistakes that killed most of my early work. Not the small stuff. The big, project-ending disasters that made me want to throw my pressure cooker out the window.
What Nobody Tells You About Bio-Art
Bio-art sounds cool until you’re actually doing it. You’re not working with paint or clay. You’re working with things that can die, get sick, or just decide they hate your workspace. Bacteria don’t care about your artistic vision. Fungi grow where they want. Slime molds are weirdly picky about everything.
I got into this after seeing photos of bacterial art on Instagram. Beautiful swirls of color, living paintings that changed over time. I thought I’d start small, make some pretty plates, maybe sell them at local art shows.
Week one: Every single culture contaminated. Week two: Same. Week three: I almost quit.
Then I met someone at a maker space who’d been doing bio-art for five years. She looked at my setup and laughed. Not mean, just the laugh of someone who’s been exactly where I was. She pointed out five things I was doing wrong. Changed everything.
The 5 Bio-Art Mistakes That Kill Your Cultures
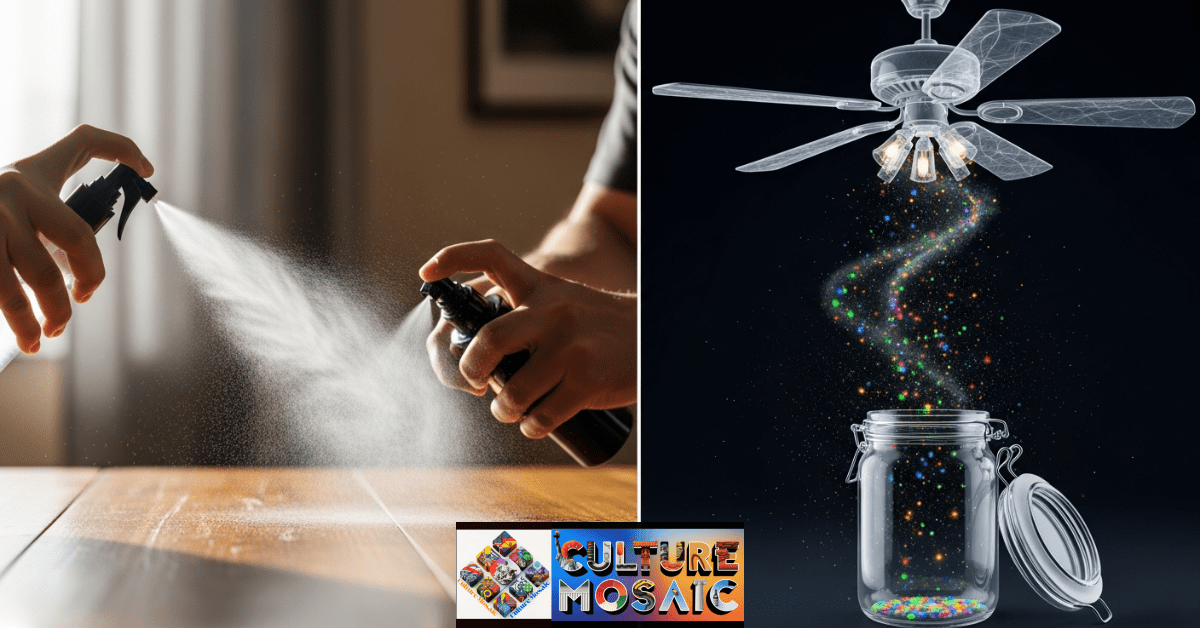
Mistake #1: Thinking Alcohol Spray Makes Things Sterile
I sprayed everything down with rubbing alcohol before starting work. Workspace, tools, my gloves, even the air (don’t do that, it doesn’t work). I felt like a real scientist. Very official.
Then I’d set up my petri dishes right under the ceiling fan.
See the problem? I didn’t. Not for weeks.
Air carries mold spores. Lots of them. When air moves across your open dish, those spores land on your nice clean agar. Game over. The alcohol killed what was already there, but it can’t stop what’s floating around your room right now.
I contaminated twenty straight cultures before someone explained this to me. Twenty. All identical green and black mold, all within 48 hours. I thought my agar was bad, or my technique sucked, or my apartment was cursed.
Nope. Just air currents.
What Actually Works
Build a still air box. Sounds fancy, but it’s just a clear plastic storage bin with holes cut in the sides for your arms. Spray the inside with alcohol, wait five minutes, then work inside it. No fans. No AC. No open windows.
My contamination rate dropped from 90% to maybe 15% overnight. That’s not a typo. One change, massive difference.
Turn off everything that moves air before you start working. Wait for your room to get completely still. Work slowly. Fast movements stir up spores. I know you want to move quickly and get everything done, but slow and careful beats fast and contaminated every time.
Mistake #2: Adding Extra Nutrients Because More Is Better
My logic seemed sound: organisms need food to grow, so more food means faster growth, which means better art sooner.
I doubled the sugar in my agar recipe. Added honey for “natural nutrition” (yes, I really thought that mattered). Made what I was sure would be super-food for my cultures.
Got bacterial soup instead.
The plates turned yellow and cloudy within a day. They smelled like fermentation. No fungal growth at all, just gross slime. I ruined an entire batch trying to be helpful.
Why This Backfires Every Time
Bacteria love sugar. They multiply fast in sweet environments. Fungi grow slower and prefer balanced nutrition. When you load up your agar with nutrients, you’re basically hanging a sign that says “Bacteria Welcome, Fungi Not So Much.”
Standard recipes use about 2% nutrients for a reason. That’s 2 grams of agar and 2 grams of malt extract per 100ml of water. Boring, simple, and it works.
I went back to basic recipes and my cultures finally started growing. Turns out the experts who wrote those recipes knew what they were doing. Who knew?
Don’t add supplements. Don’t get creative with nutrients. If your culture isn’t growing, nutrients aren’t the problem. Temperature is wrong, or you have contamination, or your organism was already dead when you started.
Mistake #3: Checking On Your Cultures Every Twenty Minutes
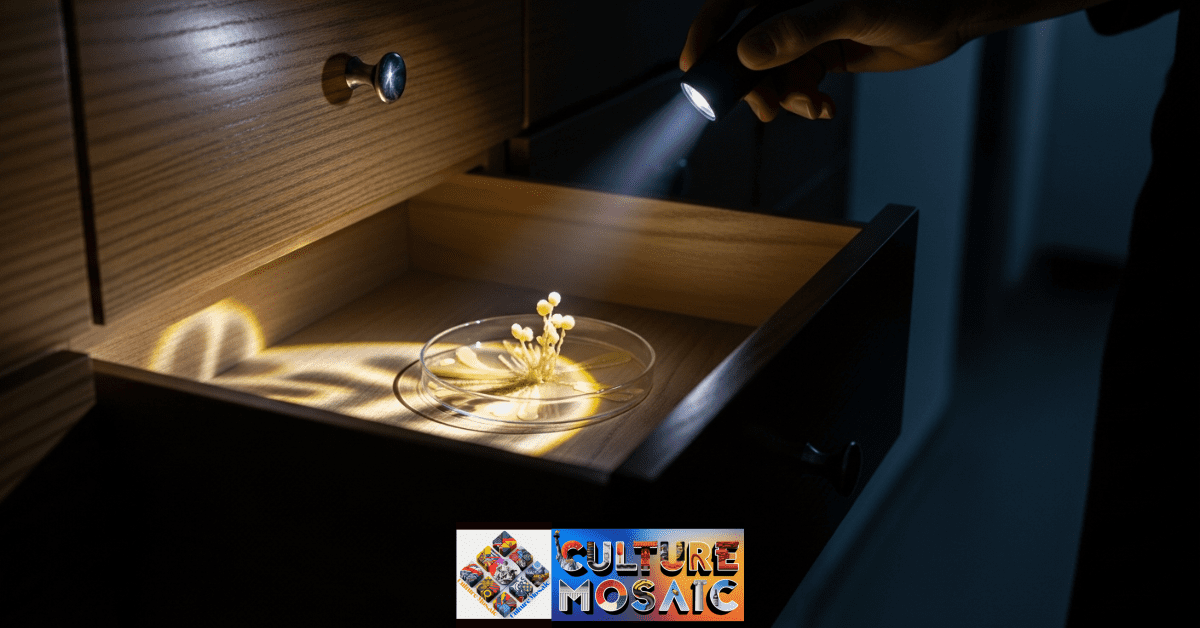
I was so excited about my first slime mold. I’d read about Physarum polycephalum, watched videos of it solving mazes, bought my culture from a supplier. This was going to be amazing.
I checked on it constantly. Every hour, sometimes more. Opened the drawer, shined my phone light on it, took photos, checked again.
Five days later, it had barely moved. Just sat there, looking pale and sad.
My friend started her slime mold the same day. She put hers in a drawer and basically forgot about it. Checked once a day, if that. Her slime mold spread across the entire plate in brilliant yellow networks.
Guess which one of us understood what we were doing?
Slime Molds Hate Being Watched
They’re light-sensitive. Bright light stresses them out. They stop moving, stop exploring, sometimes just form spores and call it quits. My constant checking with a flashlight was basically torturing the thing.
I felt stupid when I realized this. The information was right there in the articles I’d read. I just didn’t connect it to my behavior.
Now I check cultures twice a day. Morning and night. I use red light or just ambient room light. No flashlights. No phone lights. I set up a camera for time-lapse if I want to watch growth. The organisms don’t know the camera is there, so it doesn’t stress them out.
Patience is hard. I get it. You want to see progress. But checking constantly kills the very progress you want to see. Leave them alone. They know what to do.
Mistake #4: Sealing Everything Tight to Prevent Contamination
Contamination scared me. After failing so many cultures, I started wrapping my petri dishes in layers of parafilm. Sealed every edge. Nothing was getting in.
Nothing was getting out either, including air.
Three days later: dead cultures and horrible smells. The few that didn’t die completely turned into bacterial slime that made me gag when I opened them.
Living Things Need to Breathe
Seems obvious when someone says it out loud, right? But I didn’t think about it. I was focused on keeping bad stuff out, not on keeping my organisms alive.
Fungi need oxygen. They consume it and produce carbon dioxide, just like we do. Seal them in an airtight container and they suffocate. What grows instead are anaerobic bacteria, which smell absolutely foul.
That rotten egg smell? That’s your first clue you’ve created an oxygen-free environment. Congratulations, you’ve made a bacteria farm.
The Fix Is Simple
Use micropore tape. It’s medical tape you can buy at any pharmacy. It blocks mold spores but lets air through. Put it over the edge of your petri dish instead of sealing it completely.
Or just put the lid on slightly crooked. Leave a tiny gap, maybe 2-3 millimeters. Enough for air to move but not enough for major contamination to walk in.
Your cultures need to breathe. Let them.
Mistake #5: Throwing Contaminated Cultures Straight in the Trash
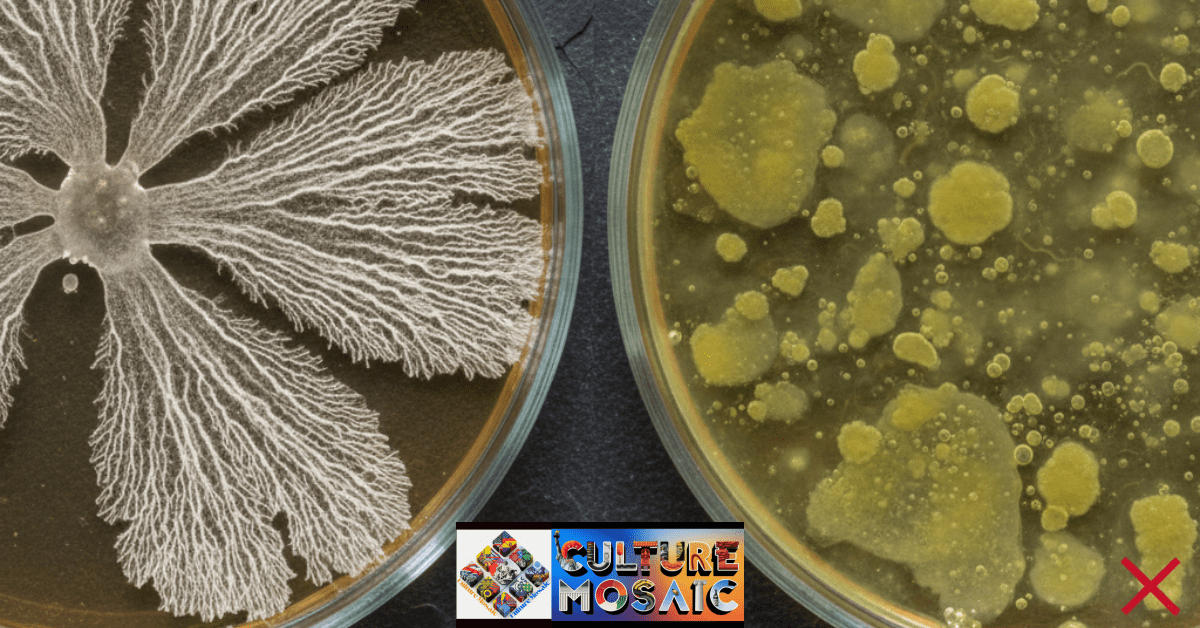
My first big contamination made me angry. I’d been so careful. Everything looked perfect for three days, then boom, black mold everywhere.
I threw the dish in the trash and went to bed frustrated.
Two days later, that same black mold showed up on the wall behind my trash can. Within a week, every new culture I started got the same contamination. I’d basically seeded my entire apartment with aggressive mold spores.
Took me a month to figure out what I’d done. Took another month to fix it.
Contamination Spreads If You Let It
When you throw away a living culture, you’re releasing millions of spores into your space. They float out of the trash, land on surfaces, get into the air. Your next project gets contaminated before you even open the agar.
Some molds are particularly aggressive. Once they’re established in your room, they contaminate everything. You’re not starting fresh each time. You’re fighting the same battle over and over because you never killed the enemy.
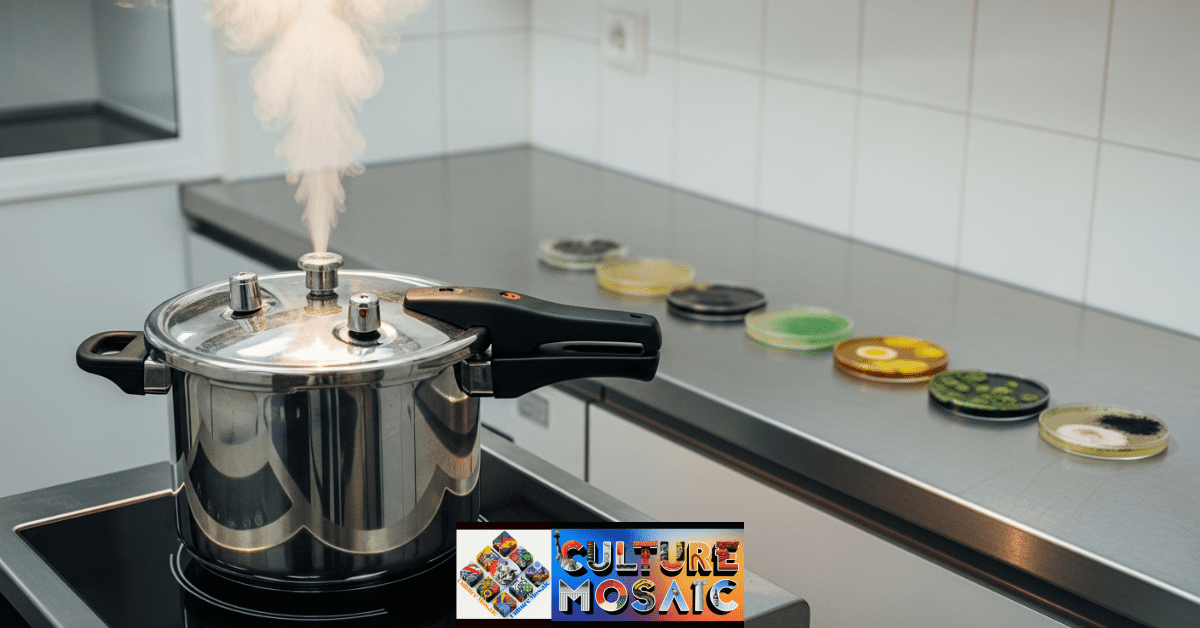
Kill It Before You Throw It
Get a pressure cooker. Put contaminated dishes in at 15 PSI for 20 minutes. This kills everything, including spores. Then you can throw them away safely.
No pressure cooker? Use bleach. Open the contaminated dish inside a sealed plastic bag, add a tablespoon of household bleach, seal it back up, and wait 24 hours. The bleach kills everything. Dispose of the sealed bag.
This step seems like overkill until you’ve dealt with persistent contamination for weeks. Then you realize it’s not overkill at all. It’s the difference between occasional problems and constant failure.
“The best way to stop air currents from ruining your art is a Still Air Box. I show you how to build one for $15 in my The Bio-Art Beginner’s Lab guide.”
What Changed When I Stopped Making These Mistakes
My success rate went from maybe 10% to around 80%. Not perfect, but good enough to actually create finished work instead of just producing trash.
I started understanding my organisms instead of fighting them. Slime molds want darkness and moisture. Fungi need air and patience. Bacteria grow fast and opportunistically. When you work with their nature instead of against it, things get easier.
The still air box made the biggest difference. Contamination dropped immediately. Everything else built on that foundation.
5 bio-art mistakes: Actually Useful Advice for Bio-Art Beginners
Start with one organism. Don’t try bacteria, fungi, and slime molds all at once. Pick one, learn it, get good at keeping it alive. Then expand.
I started with oyster mushroom mycelium because it’s forgiving. Grows fast, tolerates mistakes, looks cool on agar. After I could keep that alive consistently, I moved to slime molds.
Keep notes. Every time you make a culture, write down what you did and what happened. I have notebooks full of failed experiments, but they show me patterns. I see what works and what doesn’t.
Join communities. There are bio-art groups on Reddit, Discord, Facebook. People who’ve already made these mistakes and can help you avoid them. I learned more from online communities than from any book.
Buy quality agar. Cheap agar often has inconsistencies that cause problems. Spend the extra five dollars. It’s worth it.
Get a pressure cooker if you’re serious about this. You’ll use it constantly for sterilizing and deactivating. Mine was $60 on Amazon and has paid for itself dozens of times over.
The Ethics and Safety Part: 5 bio-art mistakes
Don’t work with dangerous organisms. Stick to safe species that won’t hurt you or anyone else. Most bio-art uses completely harmless fungi, bacteria, and slime molds, but research before you start growing something new.
Wear gloves. Wash your hands. Keep your workspace separate from where you eat. Basic lab safety matters even in a home setup.
If someone in your house has a compromised immune system, talk to them before starting bio-art. What’s harmless to you might be risky for them.
Think about what you’re doing. You’re using living things as art materials. That comes with responsibility. Treat your organisms well. Don’t make them suffer for aesthetics.
The Reality of Bio-Art Work: 5 bio-art mistakes
Your art will die. That’s not failure, that’s the medium. Living things don’t last forever. They grow, they change, they decay. That’s what makes bio-art interesting and what makes it hard.
You’ll contaminate cultures. Everyone does. The goal isn’t zero failures, it’s learning from failures faster.
Some experiments won’t work and you won’t know why. That’s frustrating but normal. Document what happened, try something different next time, keep moving forward.
The organisms will do unexpected things. Slime molds explore in weird patterns. Fungi grow in directions you didn’t anticipate. Bacteria create colors you didn’t know were possible. This unpredictability is part of why bio-art is exciting.
Making These 5 Bio-Art Mistakes Taught Me How to Succeed
5 bio-art mistakes: I needed to fail twenty cultures to understand air currents matter. I needed bacterial soup to learn that simple recipes work better. I needed to stress out a slime mold to realize organisms need space and darkness. I needed suffocated fungi to understand gas exchange. I needed persistent contamination to learn that disposal matters.
Every mistake taught me something I couldn’t learn any other way. Reading about sterile technique doesn’t sink in like watching your twentieth contaminated plate. Being told “check cultures less often” doesn’t click until you see the difference in growth rates.
Your first attempts will probably fail. That’s fine. Expected, even. The question is whether you’ll figure out why they failed and adjust.
These 5 bio-art mistakes killed most of my early work, but they also taught me how to actually do this. Now I’m growing consistent cultures, creating pieces that last, and experimenting with new organisms. The failures were the foundation for everything that came after.
Start simple. Make mistakes. Learn from them. Keep going. That’s how bio-art works.
Frequently Asked Questions About 5 Bio-Art Mistakes
How long before I see growth in my cultures?
Fungi usually show visible growth in 3-5 days if conditions are right. Slime molds can start moving within 24 hours. Bacteria show up fast, sometimes within a day. If nothing’s happening after a week, something’s wrong. Check your temperature, make sure there’s enough moisture, and verify your organism was alive when you started.
Do I need a real laboratory to do bio-art?
No. I work from my apartment. You need a pressure cooker, some plastic containers, basic agar supplies, and an understanding of sterile technique. My entire setup cost less than $200 to start. You can always upgrade later, but you don’t need fancy equipment to begin.
How do I know if my culture is contaminated?
Colors or textures you weren’t expecting are the main sign. Fuzzy green, black, or blue growth usually means mold. Cloudy or slimy growth that’s yellow or pink often means bacteria. Bad smells are a dead giveaway. If it doesn’t look like what you’re trying to grow, assume contamination and kill it before throwing it away.
What temperature should I keep my cultures at?
Room temperature works for most organisms. Somewhere between 68-72°F is good. Some things like it a bit warmer, around 75-80°F. Don’t put cultures in direct sunlight or near heat sources. Consistent temperature matters more than hitting exact numbers. Big temperature swings stress organisms out.
Can I keep cultures alive indefinitely?
Depends on the organism. Slime molds can go dormant for years if conditions get bad. Fungi can live for weeks or months if you transfer them to fresh agar periodically. Some organisms complete their lifecycle in days and there’s nothing you can do about it. Research your specific organism to understand its lifespan and care needs.